Trade
The Trade system allows players to safely exchange goods, money, or properties directly with one another. To prevent any fraudulent attempts, all transactions must be initiated, structured, and confirmed by both parties, either through direct chat commands or via the dedicated phone application.
Initiating a Trade
You can start a trade with another player through two main methods: using chat commands or directly from the Trade application on your smartphone.
Real-time Notifications
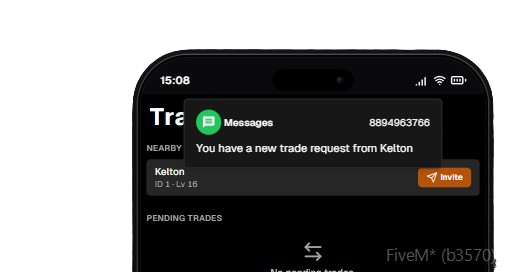
When another player sends you a trade request, you will instantly receive a pop-up notification on your phone screen from the messaging app formatted as: You have a new trade request from [Name].
Method 1: Chat Commands
If you prefer a direct console approach, you can manage trade requests using the following system commands:
| Command | Description |
|---|---|
/trade [ID / Player Name] |
Sends a trade request to a specific player. |
/trade-accept |
Accepts the most recent trade invitation received. |
/trade-cancel |
Cancels a request sent by you or closes the active trade session. |
Method 2: Trade App on the Smartphone
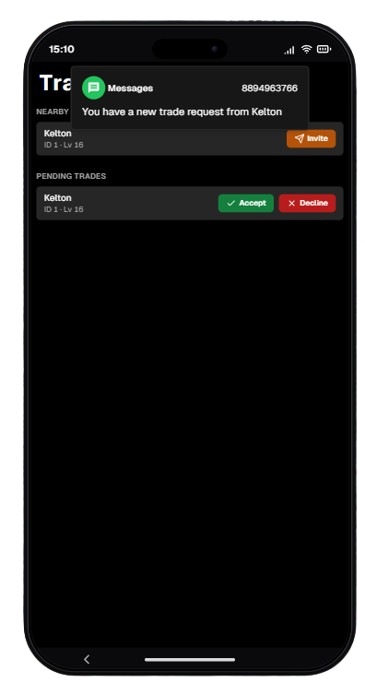
Open your in-game phone and locate the Trade app. The interface is split into two main sections for effortless navigation:
- NEARBY PLAYERS: Automatically scans your immediate vicinity and displays all available players. You can view their Name, ID, and Level. Pressing the orange Invite button sends an instant trade request.
- PENDING TRADES: Displays incoming trade invitations received from other players that are currently pending.
- Click the green Accept button to open the trade window.
- Click the red Decline button to reject the request.
Trade Interface & Executing the Exchange
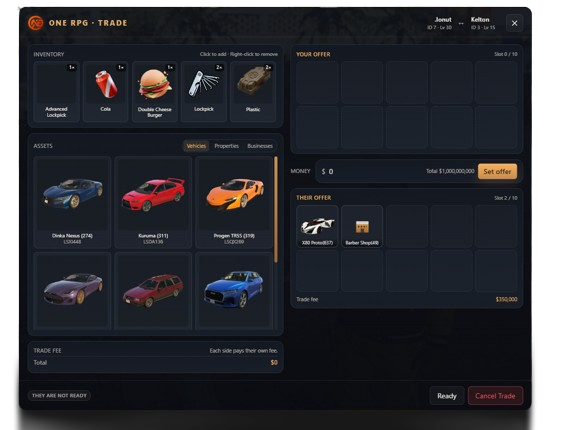
Once the invitation is accepted, the secure main interface titled ONE RPG · Trade will appear on your screen.
1. Managing Assets (Left Panel - ADD TO TRADE)
On the left side of the screen, you have direct access to all your character's assets that can be added to the trade:
- Left-click on an item or vehicle to add it to your offer.
- Click the red
-button on the item in your offer box to remove it from the trade.
The menu is split into two main categories and four selectable tabs:
- Inventory: Displays items from your backpack (e.g., Bandage, Lockpicks, etc.).
- Assets: Contains three selectable tabs for high-value assets:
Vehicles- Your cars and motorcycles, displayed with name, vehicle ID, and license plate (e.g., Hardy (1169), X80 Proto (2133), Burrito (2209)).Houses- Properties you own.Businesses- Businesses under your ownership.
2. Structuring the Offer (Center & Right Panels)
In the central and right areas, you can configure and review transaction details in real time:
- YOUR OFFER: Slots where your added items appear. There is a strict limit of maximum 10 slots per trade (
Slot 0 / 10). - MONEY: Dedicated currency field. Enter the desired amount in the input box and click the orange Add money button. Your current available cash balance is displayed on the right side (e.g., Available: $220,637).
- THEIR OFFER: A secure, read-only area where you can see exactly what the other player has offered (items, vehicles, buildings, or money).
Vehicle Inspection System
To guarantee total transparency and eliminate scam attempts, the interface features a smart Vehicle Inspection System.
When you hover your mouse cursor over any vehicle card added to an offer box, a pop-up window containing detailed real-time information will appear:
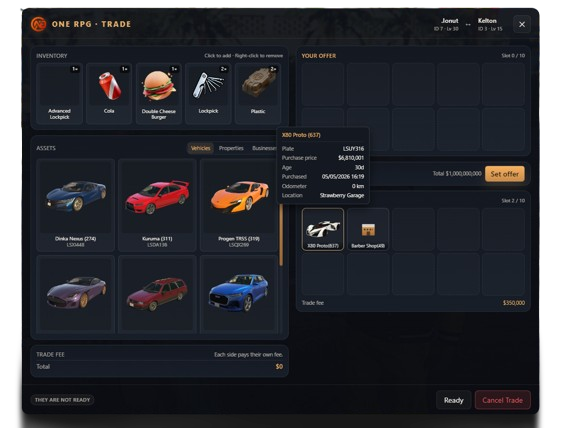
- Plate: Vehicle's license plate number (e.g., LSVM090).
- Purchase price: Original purchase price (e.g., $500,000).
- Age: Age of the vehicle calculated in days (e.g., 82d).
- Purchased: Exact date and time of purchase (e.g., 01/05/2026 20:48).
- Odometer: Current mileage / total distance driven (e.g., 1,460 km).
- Location: Garage or exact location where the vehicle is stored (e.g., Strawberry Garage).
Fees & Finalizing the Trade (Bottom Bar)
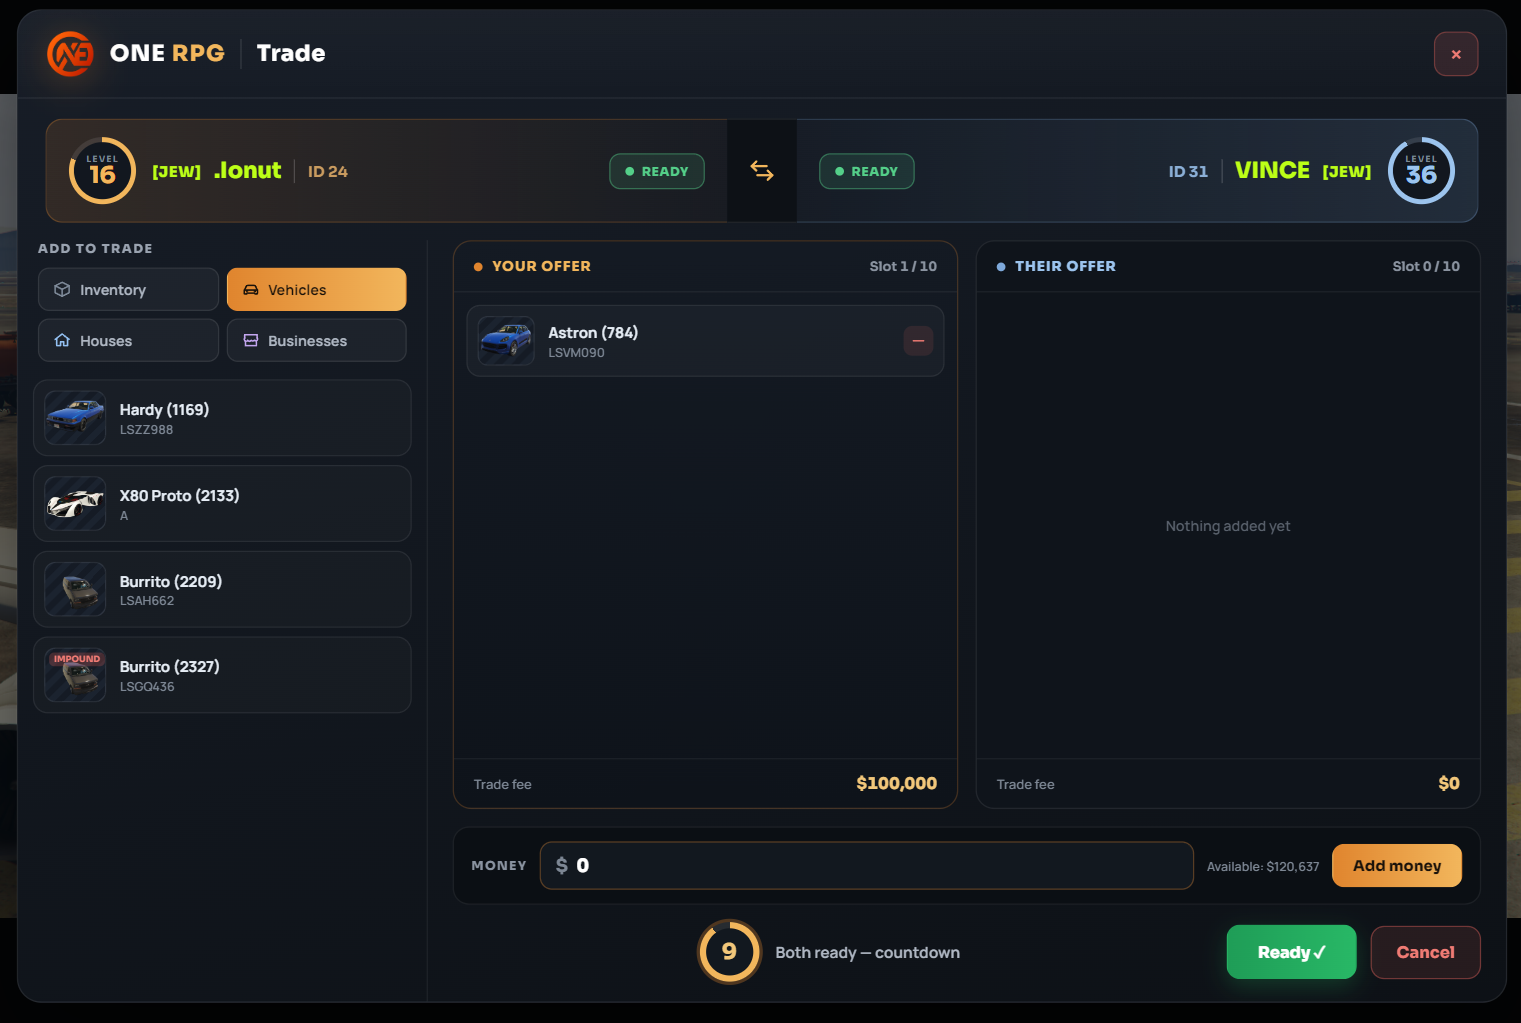
- Fee Calculation (Trade fee): Each player pays their own individual fee based on the value and type of items added to their offer box. The fee is displayed at the bottom of each offer panel (e.g.,
$100,000in the YOUR OFFER box for an added vehicle). - Preparing the Trade (Ready): Once you have thoroughly inspected the THEIR OFFER panel and agree to all terms, click the Ready button.
- The status indicator in the header bar will change from
● NOT READYto● READY. - Your button will turn green and display a checkmark (
Ready ✓).
- The status indicator in the header bar will change from
- Countdown: The moment both players press the Ready button, a 10-second countdown will trigger at the bottom of the screen (
Both ready - countdown). This provides a final safety buffer. - Cancellation (Cancel): The trade can be canceled instantly by clicking the red Cancel button at any stage of the transaction, including during the countdown, safely returning all assets.
Safety Rules
- Always verify your trading partner's ID and Level in the top-right corner of the Trade window (e.g., ID 31 VINCE [JEW] Level 36) to ensure you are trading with the correct individual.
- Do not press the Ready button if the other player repeatedly alters their offered items or if the monetary amount does not match your initial agreement!
Always Use Tooltips!
Before accepting any trade involving vehicles or properties, make sure to hover your mouse over the asset icon in the THEIR OFFER tab. Check whether the mileage (Odometer), location, or technical details match what the other player promised before making the deal!